ABOVE;DR: Specification-based development uses Markdown specifications and Code Studio prompt files as a single source of truth, enabling AI to reliably generate, test, review, and deploy code while preserving context. This blog features fast files and practical workflows, plus project structure and best practices for building real-time projects.
AI revolutionizes software development but loses context between conversations, forgets previous architectural decisions, and produces contradictory implementations unless you keep re-explaining the same requirements.
Specification driven development treat the Markdown specification as your single source of truth. Rather than repeating requirements in a conversational AI, you keep a single living document that captures what your application does, how it behaves, and why.
Synchronization® Code Studio makes this easier with a prompt.md files (and Custom Agents), workflow files that tell your AI assistant what to do at each stage of development. This enables seamless spec-to-code compilation, code review, testing, and deployment workflows.
This blog post will guide you in implementing a practical spec-to-code workflow using prompt.md templates while creating real-world analytics dashboard examples.
Why AI-assisted development fails
Core problem: loss of AI context
When working with traditional AI-assisted development, AI often generates code in isolation without maintaining or referring to the broader context of the project.
Example:
- You requested a feature (for example, authentication).
- AI generates code separately.
- Then, you request a change, and the AI forgets previous constraints (tenancy, RBAC, security rules, naming conventions).
- You repeat the requirements and still get deviations.
What is specification based development?
Specification-based development is a methodology that:
- The specification is the source code. Your Markdown file describes the complete application design (behavior, API, constraints, and acceptance criteria) in plain English mixed with structured data. AI generates implementation; Code Studio’s Custom Agent compiles your specifications into working code.
- Each AI task refers to the same specifications. You reduce contradictions and rework.
- Documentation remains aligned. The specifications evolve along with the code rather than becoming stale.
Example:
User: Create me a user authentication module.
AI: Generates authentication code
Specification-based development ensures AI always has access to relevant specifications. This means that the resulting code is not only functional but also aligned with the organization’s architectural requirements, security standards, and workflows:
# User Authentication Module Specification
## Overview
Multi-tenant SaaS application requiring OAuth 2.0 with role-based access control (RBAC)
across 10,000+ organizations.
## RBAC Structure
- Organization Admin: Full access to org settings
- Team Lead: Manage team members and reports
- Member: Read-only access to team data
This format makes requirements explicit, so that code generation and review can validate them consistently.
How spec-based development works with Markdown in Code Studio
What is the prompt.md file?
A prompt file is a workflow specification written in Markdown that tells AI Code Studio what to do at each stage of development. They are the ultimate tool for automating your development process.
Main features:
- Repeatable instructions: Stores reusable commands and specifications to ensure consistent execution across projects.
- Task automation: Automate critical stages like compilation, testing, code review, and deployment for faster delivery.
- Tool access: Gives AI direct access to file operations, terminal commands, and web searches for comprehensive workflow support.
- Reusable workflows: Share and deploy files quickly across teams and projects to standardize development practices.
- Version control: Manage and track prompt files in Git alongside source code for complete history and collaboration.
Prompt.md file format (template)
All prompt files follow this structure:
---
name: prompt file name
mode: agent
description: Brief description of what this prompt does
---

# Main Task Title
Step-by-step instructions for the AI.
- Use bullet points for clarity
- Include specific file paths
- Reference specifications
- Define expected outputs
This structure is simple, but it is key to making AI output consistent and reviewable.
Specification-driven development with Markdown: Project setup (dashboard example)
Create a complete dashboard project with help prompt.md files.
Recommended project structure
dashboard-analytics/
├──. this studio/
│ └── hint/
│ ├── compile.prompt.md
│ ├── lint.prompt.md
│ └── test.prompt.md
├── src/
│ ├── components/
│ │ ├── Dashboard.tsx
│ │ ├── Chart.tsx
│ │ └── Widget.tsx
│ └── type/
│ └── dashboard. type.ts
├── test/
│ ├── dashboard.test.ts
│ └── api.test.ts
├── package. json
└── tsconfig. json
Notes: Save the instructions .codestudio/prompts/ so it’s easy to find, review, and execute consistently.
Create your prompt file
To create a Custom Command in Code Studio, follow these steps:
- Open a Chat Window.
- Select File Prompt.
- Click +New File Prompt and select a location based on your preferences.
- Type a quick file name.
For further insight, check out our documentation about configuring custom requests.
For `.codestudio/prompts/` folder and create these files:
compile.prompt.md: Compile specifications to code.dashboard.prompt.md: Dashboard specifications.review.prompt.md: Code review against specifications.security.prompt.md: Security audit.test.prompt.md: Test generation.lint-spec.prompt.md: Rolling specifications.
Notes: You can find all examples of these prompt files in this repository.
Core prompt files for spec-driven development
Turn your Markdown specification into working code:
Create compile.prompt.md (Code specification)
---
name: compile
mode: agent
description: Compile specification to production code
---

# Compile Dashboard Specification to Code
## Task
Convert the specification in `dashboard.main.md` to working React/TypeScript code.

## Steps
1. Read Specification
   - Open and read `dashboard.main.md` completely
   - Understand all features, APIs, and database schema
2. Generate Code
   - Create components in `src/components/`
   - Create API services in `src/api/`
   - Create types in `src/types/`
3. Implement Features
   - Metric Widget component with real-time polling
   - Custom dashboard layout with drag-and-drop
   - PDF export functionality
   - Dashboard sharing
4. Test
   - Create unit tests in `tests/`
   - Run `npm run test`
   - Ensure all tests pass
5. Build
   - Run `npm run build`
   - Check for TypeScript errors
   - Verify no console warnings
Create dashboard.prompt.md
---
name: dashboard-specification
agent: agent
description: Complete Analytics Dashboard Specification
---

## Executive Summary
Interactive real-time dashboard for SaaS analytics. End users can create.
custom dashboard layouts, view KPIs, analyze trends, and export data.
Supports role-based access control (Admin, Manager, Viewer).

## System Architecture
### Frontend Stack
- React eighteen with TypeScript
- Recharts for data visualization
- Tailwind CSS for styling
- React DnD for drag-and-drop

### Backend Stack
- Node.js with Express
- JWT authentication

### Infrastructure
- Docker containers
- GitHub Actions CI/CD
- AWS deployment

## Feature: Real-Time Metric Widget
### User Story
As a business user, I want to see key metrics with current values and trends, So, I can quickly assess business health.

### Acceptance Criteria
1. Widget displays metric name, current value, and unit
2. Shows % change from previous period with color indicator (green: +, red: -)
3. Updates without page refresh (polling every 5 seconds)

### Testing Requirements
// Unit Tests
- Test value formatting for different units (USD, percentage, count)
- Test trend calculation (positive/negative/zero)
- Test polling interval setup and cleanup
// Integration Tests
- Test API call on mount
- Test polling updates component
- Test drill-down navigation
Create review.prompt.md: Code quality review
Review the generated code against specifications and best practices:
---
name: code-review
agent: agent
description: Review code for quality and spec compliance
---
# Code Review: Spec Compliance & Quality
## Task
Review the implementation in `src/` against `dashboard.main.md`

## Review Checklist
### Code Quality
- [] Components are reusable.
- [] Clear naming conventions?
- [] Proper error handling?

## Output Format
For each issue found:
- Type: Bug | Warning | Suggestion
- Location: File path and line number
- Description: What is the issue?
- Fix: How to fix it
Create security.prompt.md: Security audit
Analyze code and specifications for security vulnerabilities:
---
name: security-audit
agent: agent
description: Security analysis and threat modeling
---

mode: agent
description: Security analysis and threat modeling
# Security Audit
## Task
Perform security analysis on `spec/` and `src/`

## Security Checks
### Specification Review
- [] Authentication mechanism defined.
- [] Authorization rules clear?
- [] Data protection requirements specified.

### Vulnerabilities to Check
- SQL Injection
- XSS (Cross-Site Scripting)

## Output
- Risk level: CRITICAL | HIGH | MEDIUM | LOW
- Affected component
- Vulnerability description
Create test.prompt.md: Test creation
Generate comprehensive tests of specifications:
---
name: test-workflow
agent: agent
description: Generate tests from the specification.
---

# Generate Tests from Specification
## Task
Create comprehensive tests matching `spec/dashboard.main.md`
## Test Structure
### Unit Tests (`tests/unit/`)
- Test individual functions and components
- Test data transformations
- Test error conditions

### Integration Tests (`tests/integration/`)
- Test API endpoints
- Test database operations
- Test component interactions

## Coverage Requirements
For each feature in spec:
1. Happy path test (valid inputs, success case)
2. Error path test (invalid inputs)
3. Edge case test (boundary conditions)
4. Performance test (meets spec latency requirements

## Success Criteria
- [] All acceptance criteria have tests
- [] Test coverage > 80%
- [] All tests pass
- [] Tests run in < 5 seconds
Create lint-spec.prompt.md: Spec quality
Make sure specifications are clear and complete:
---
name: compile
agent: agent
description: Lint specification for quality and completeness
---

# Lint Specification
## Task
Review `spec/dashboard.main.md` for quality issues.
### Clarity
- [] All requirements unambiguous?
- [] Technical terms defined?

### Consistency
- [] Same terms used throughout?
- [] No duplicate requirements?

### Technical Feasibility
- [] Architecture realistic?
- [] Tech stack compatible?

## Issues Found
- Type: Clarity | Completeness | Consistency | Feasibility
- Issue: Description
- Severity: CRITICAL | WARNING | INFO
Automated workflow chain
Chain multiple commands for complete automation:
.codestudio/prompts/full-workflow.prompt.md
---
name: full-workflow
agent: agent
description: Complete automated development workflow
---

# Full Development Workflow
Execute complete development pipeline:

## Phase 1: Specification Quality
/lint-spec.prompt.md
Wait for completion

## Phase 2: Code Generation
/compile.prompt.md
Wait for completion

## Phase 3: Testing
/test.prompt.md
Waiting for completion

## Phase 4: Code Quality Review
/review.prompt.md
Wait for completion

## Phase 5: Security Audit
/security.prompt.md
Wait for completion

## Output Summary
- All checks passed. → Ready to merge.
- Any failures? → Report issues with fixes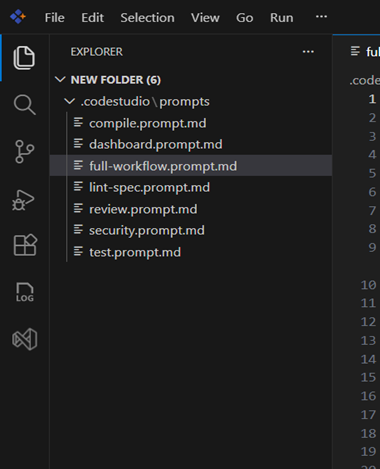
Using instructions in Code Studio
Steps to start your development with generated commands:
Method 1: Via chat
Choose /full-workflow to run the entire workflow.
Code Studio:
- Read
full-workflow.prompt.md. - Follow all instructions.
- Compile specifications to code.
- Report completion status.
Method 2: Via command palette
- Press
Ctrl+Shift+P. - Choose
Chat: Run Prompt... - Select the prompt file from the list (eg
compile.prompt.md).
The output for the dashboard is created using the prompt file:
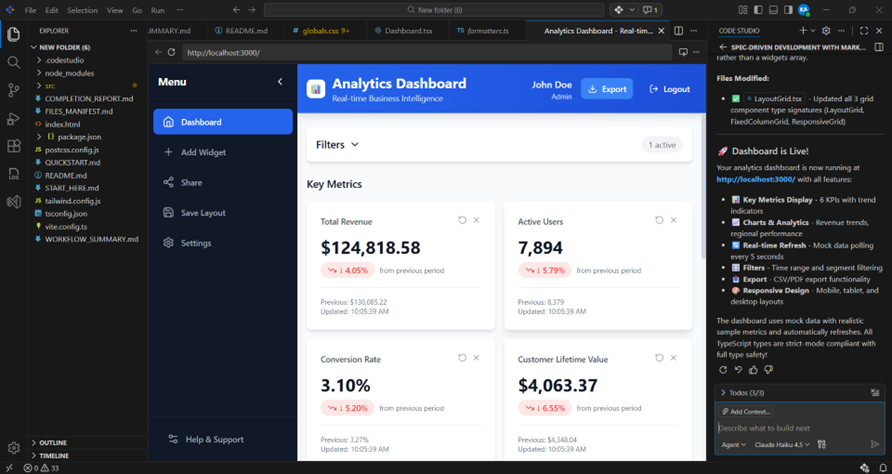
Notes: For larger teams that want standard personas, Code Studio also supports reusable Custom Agent configurations that combine multiple prompt files with predefined instructions and tool access. See the Custom Agent documentation for advanced team workflows.
Frequently Asked Questions
What happens if the specifications are incomplete?
Incomplete specifications lead to misaligned expectations and rework. Vague requirements like “supports PDF and CSV formats” lack important details about format specifications, performance targets, and file limitations. The complete specification includes format descriptions, performance requirements (for example, <5 seconds latency), file size limits, and naming conventions.
Why is over-specification a problem?
Over-specification locks teams into unnecessary details, reducing flexibility. Specifying exact RGB values, specific fonts/sizes, or pixel-perfect padding limits implementation options. Instead, reference design systems: use design variables for colors, system defaults for fonts, and design tokens for spacing to maintain consistency while allowing for adaptation.
How do I know if my specifications are at the right level of detail?
The right level is when developers can implement the feature without clarifying questions and the specifications remain stable as the technology develops. Test by passing your specifications to foreign developers and check if they need to answer any questions.
Should I include implementation details in my specifications?
No. Specifications must be explained What And WhyNo How. Don’t specify “use React hooks” define the requirements: “dashboard state must be synchronized with browser local storage and persist across sessions.” Developers can choose the implementation approach.
How to manage specifications that span multiple teams?
Organize hierarchically with clear ownership boundaries. Create a master specification for the overall architecture, then team-specific sub-specifications (frontend/components.md, backend/api.md) with shared definitions (shared/data-model.md). Each team refers to the same definitions, reducing duplication and ensuring consistency.
Conclusion
Thanks for reading! In this blog, we’ve looked at how spec-driven development can leverage real-world features, such as analytics dashboards, from design to implementation.
Specification-based development with Syncfusion Code Studio prompt.md files:
- Eliminates loss of AI context across conversations and keeps documentation coordinated with code. Provide clear requirements for AI agents.
- Automate compilation, testing, review, and deployment workflows.
- Creates a consistent and repeatable development process, enabling version-controlled specifications, and team alignment.
- Turn specifications directly into working code, and integrate testing and quality reviews into workflows.
As human-AI collaboration becomes the norm, prompt.md-driven workflows in Code Studio offer a powerful way to maintain intent and maintain consistency.
You can contact us via the support forum, support portal, or feedback portal for questions. We are always happy to help you!
PakarPBN
A Private Blog Network (PBN) is a collection of websites that are controlled by a single individual or organization and used primarily to build backlinks to a “money site” in order to influence its ranking in search engines such as Google. The core idea behind a PBN is based on the importance of backlinks in Google’s ranking algorithm. Since Google views backlinks as signals of authority and trust, some website owners attempt to artificially create these signals through a controlled network of sites.
In a typical PBN setup, the owner acquires expired or aged domains that already have existing authority, backlinks, and history. These domains are rebuilt with new content and hosted separately, often using different IP addresses, hosting providers, themes, and ownership details to make them appear unrelated. Within the content published on these sites, links are strategically placed that point to the main website the owner wants to rank higher. By doing this, the owner attempts to pass link equity (also known as “link juice”) from the PBN sites to the target website.
The purpose of a PBN is to give the impression that the target website is naturally earning links from multiple independent sources. If done effectively, this can temporarily improve keyword rankings, increase organic visibility, and drive more traffic from search results.
Comments are closed, but trackbacks and pingbacks are open.